This blog post has been a long time coming! I am a huge fan of color blocking and have been meaning to write this for a while. If you aren’t familiar with the term, color blocking is when you segment a piece of a pattern and use multiple materials to make up that one piece. For example, here is a picture of a color blocked Sweet Tee I made with a floral double brushed polyester and a cream French terry:

Editor’s Note: Want to try color blocking? Try it on our Mae Poncho!
So if you’re getting all sorts of excited to start color blocking, this tutorial is for you! For this tutorial I will be using the Sweet Tee pattern by Patterns for Pirates.

In this tutorial, I will be doing a single color block across the chest, but you can apply the same method multiple times or in various pieces of your garment to achieve a unique color blocking look on any pattern.
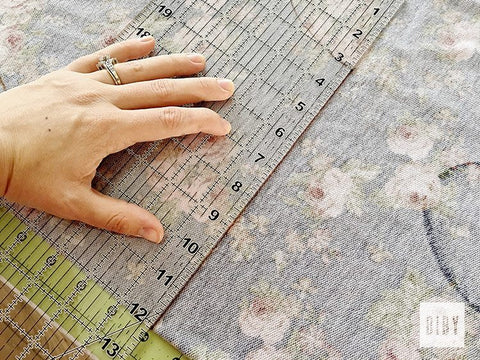
First, you will be marking a horizontal line about 3/8 of an inch above the bust line on the front piece of your pattern.

Now you’re going to go ahead and fold over your fabric and place your front pattern piece on it to trace. Trace around the neck, the arm and down to color blocking line you just drew. Make a little “tail” out from the endpoint so you can see clearly where it ends.

You’re also going to make a small mark on the fold to show where your color blocking line ends on that side of the pattern piece.


Next, grab your ruler and extend out your markings straight down by a half of an inch then connect the points at the bottom. The extra half of an inch you added will cover your seam allowance when you sew your two blocks together. Go ahead and cut it out once you’ve finished this.


Now it’s time to do our back piece. Start by placing your top piece on top of your back pattern piece, lining them up at the bottom of the cuff. Then mark on your back piece your new color block line so that it matches up with the line on your front piece.

Next, you’re going to repeat everything you did with your front top block for the back top block. Mark around the pattern piece down to your color block line, add an extra half of an inch down, then join it at the bottom. Once everything is traced, go ahead and cut that sucker out too.


Now it’s time to do the bottom pieces. For this tutorial I decided to do a dress length Sweet Tee but you can do whatever length you’d like and it’ll all work the same. First, you’re going to fold over your second color blocking fabric and lay down your front pattern piece. This time you’re going to trace around the bottom of the pattern piece up to the color blocking line.


Then you’re going to add the half of an inch going straight upward from both your outside and inside points.

Then connect your bottom points to get your bottom color block. Repeat this with your back pattern piece.
Because your front and back pieces on the Sweet Tee are different, I like to mark my back piece with a “B” so I can keep track of which bottom piece goes with which top piece.

Now you should have two top pieces and two bottom pieces.

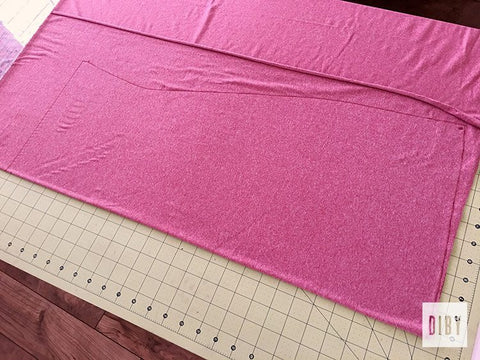
Go ahead and pin your top pieces to your bottom pieces with the right sides together and sew those babies together with a half of an inch seam allowance.

Once they are sewn together I want you to give them a good press to get rid of any waviness.

At this point you have the option to topstitch your seam so it lies flat. Quite frankly I was feeling too lazy to topstitch for this tutorial but the majority of the time I do. It will keep your seam nice and smooth and gives it a more professional finish.
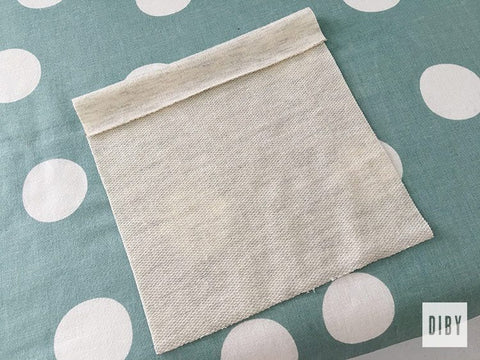
Bonus: Chest Pocket
If you’d like to add a chest pocket to your Sweet Tee like mine, start by cutting out a 5.5″ x 6.5″ rectangle. Then press the top down by an inch and topstitch it.

Then fold your sides and bottom in by a quarter of an inch and press them. Lots and lots of steam or starch here.

Now pin your pocket to your top and sew her on staying as close to the edge as possible to make sure that you catch those folds.

You’re done! Now go color block all the things! Shirt torsos, sleeves, vertical color blocks…the world is your oyster my friend.

Originally Authored by Jessica Hooley. Archived by Kathryn Graham.